When Good Printing Fails at the Spine
Imagine this: a reader opens a brand-new book, and with a faint crackle, a page slips free. In that single moment, it’s not the paper or the brilliant cover design that failed—it’s the book spine adhesive. This one critical component can undermine an entire print run, turning a beautiful product into a customer complaint.
Perfect binding depends on the precise interaction of adhesive chemistry, temperature, pressure, and paper conditioning. Even a perfectly coated spine can fail if the paper is too dry to bond properly, or the milling is too shallow, or the adhesive film is too thin. Here’s how to diagnose the issue and fix it for good.
How to Identify Weak Spine Adhesion
Look for these early warning signs during production or quality control checks. Spotting them early can save an entire batch from failure.
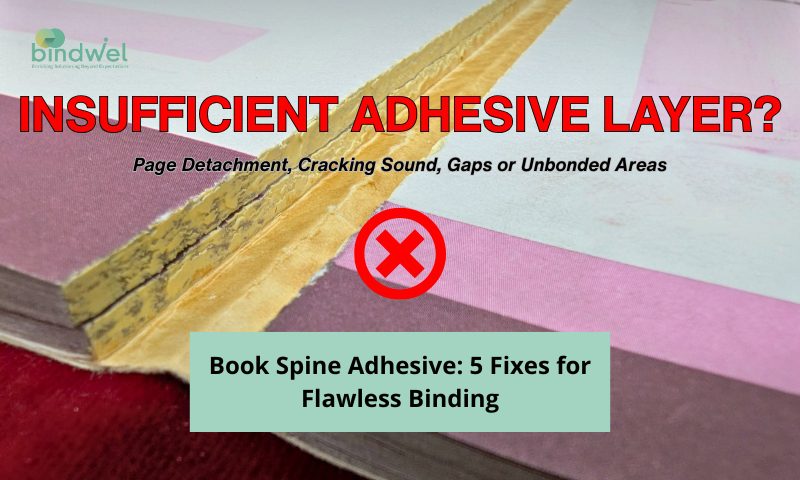
- Visible Adhesive Lines at the First & Last page: the adhesive hasn’t spread evenly or penetrated the paper fibers. This usually happens when the adhesive film is too thin or the nipping pressure is not uniform.
- Cracking Sound: A distinct crackle when opening the book indicates a brittle, under-penetrated adhesive bond that is breaking, not flexing.
- Gaps or Unbonded Areas: A close look reveals that the adhesive hasn’t filled the spine channels evenly, leaving sections vulnerable.
- Poor Page-Pull Strength: The pages fail manual or mechanical pull tests, requiring very little force to be detached.
- Adhesive Film Without Proper Bond: Sometimes the adhesive film seems perfect but hasn’t properly anchored into the paper or cover fibers. This creates a weak “skin bond” that separates under stress.
These symptoms point to either poor adhesive penetration or inadequate film build—both prevent the strong, flexible joint required for a durable book.
Root Causes of Weak Book Spine Adhesive
A weak bond is rarely a single-point failure. It’s usually a combination of the following factors.
1. Incorrect Machine Settings
The binder setup is often the biggest variable and the first place to check.
- Milling Depth: You must remove 0.5mm–3mm of material, depending on paper type and signature fold to expose fresh, raw fibers for the glue to grab.
- Notching: Grooves should be approximately 3mm to 5mm apart and 0.5mm to 1mm deep to create ridges that anchor the adhesive mechanically.
- Adhesive Pot Temperature: A variation of just 10°C to 15°C can dramatically increase or decrease the viscosity (thickness) of your adhesive, reducing its ability to flow or wet the substrate effectively, leading to poor adhesion or bond failure.
- Application Pressure: Too light, and you get a weak surface coating; too heavy, and the adhesive squeezes out leaving inadequate glue for bonding.
- Adhesive Film Thickness: You must maintain a 0.5mm–1.2mm film build for consistent and reliable bonding strength (depending on your spine length and width) to ensure proper substrate coverage and bonding.”
2. Using the Wrong Adhesive
Not every adhesive behaves the same way with different substrates.
- Viscosity Mismatch: High-viscosity EVA may not penetrate higher bulk paper on high-speed machines, while low-viscosity variants may over-penetrate and flood the inner pages (adhesive running in).
- Substrate Compatibility: Always use a high-performance adhesive like PO or PUR for heavily coated, glossy, or digitally printed stocks that resist ink solvents.
- Aging or Contaminated Adhesive: Repeatedly reheated EVA loses its wetting ability and chemical properties over time, creating brittle joints.
- TDS Reference: Always check the Technical Data Sheet (TDS) for the correct operational temperature and viscosity values for your specific book spine adhesive and perfect binding machine.
3. Paper & Environmental Factors
Paper expands with excess moisture and when exposed to excess heat, directly impacting the bond.
- Grain Direction: For flexibility, the paper grain must always run parallel to the spine. Cross-grain creates constant stress that fights against the bond.
- Moisture Content: Aim for 4.5%–5.5% for inner pages and covers and 6–8% for boards (hard case). Incorrect moisture levels can lead to various issues like blowholes, honeycomb spine, etc..
- Relative Humidity (RH): Maintain 45–55% RH in your storage, printing, and binding areas to keep the paper stable.
- Surface Coatings: Avoid toner, varnish, and certain printing inks near the spine of inner cover and fold areas of signatures, these can act as a barrier, blocking adhesive wetting. Scrape or pre-treat these areas before binding.
5 Fixes for Rock-Solid Book Spines
Implement these five practical fixes to eliminate weak spines from your production floor.
Fix 1: Calibrate Milling and Notching
Ensure clean, fiber-exposed surfaces and uniform notches (3mm to 5mm apart). This improves adhesive flow and creates a powerful mechanical anchorage, which is far stronger than simple surface adhesion.
Fix 2: Control Adhesive Pot Temperature & Viscosity
Use calibrated digital thermometers to confirm both the pot and roller temperatures stay within the TDS range. Even minor variations can thicken or thin the book spine adhesive layer and block its penetration into the spine or cause it to flow too freely. Keeping viscosity logs per batch helps track consistency.
Fix 3: Maintain Ideal Film Thickness
Monitor your film build regularly, targeting a 0.5mm–1.2mm adhesive layer. Too thin, and the adhesive won’t bridge the gaps in the spine; too thick, and it can cause cracking or increase drying times, compromising the final bond. Bindwel’s ACC feature in BW@2500 Prime machine
Fix 4: Match Adhesive to Paper Type
Before every large run, bind a small batch of the actual stock and perform page-pull tests. This quick check is the best form of risk management, immediately telling you if your adhesive and temperature profile are mismatched for the substrate.
Fix 5: Stabilize Paper & Room Conditions
Store paper and allow it to acclimate at an RH of 45–55% for at least 24 hours before binding. Stabilized paper prevents moisture-related changes during the binding process, ensuring the book spine adhesive cures correctly and maintains flexibility.
Setup Checklist
Before every job, confirm these five checkpoints. This 2-minute check prevents costly returns later.
- RH and paper moisture within range
- Grain direction parallel to spine
- Milling depth and notch spacing verified
- Film thickness measured (0.5–1.2mm)
- Pot and roller temperatures within TDS limits
Bindwel’s BindRight Advisory Program
Bindwel’s BindRight initiative helps printers and publishers reduce adhesive-related failures by combining training, process audits, and equipment calibration. Led by Suresh Nair, our CTO & Book Scientist, it helps you standardize adhesive behavior, improve consistency, and achieve repeatable excellence. Users report up to 90% fewer spine failures after implementing BindRight.
The Spine That Holds Your Reputation
The spine doesn’t just hold pages together—it holds your brand’s reputation. Perfecting your book spine adhesive process is about precision: the right film build, the correct heat, balanced moisture, and controlled pressure. When you get that right, every book you ship reflects a quality that lasts.
Follow Bindwel on Facebook, LinkedIn, Twitter, Instagram and YouTube for the latest industry updates, innovative solutions, and expert tips to optimize your production

